 When you start Cashflow for the first time, you’ll be greeted by the “Accounts” screen. Once you’ve set up accounts and started entering transactions, you’ll find a wealth of information available here. To add an account, click the “Add Account” button at the lower left of the screen.
Adding an Account
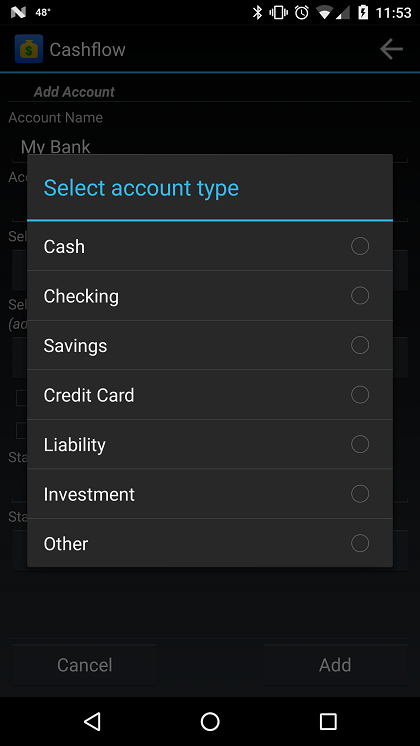
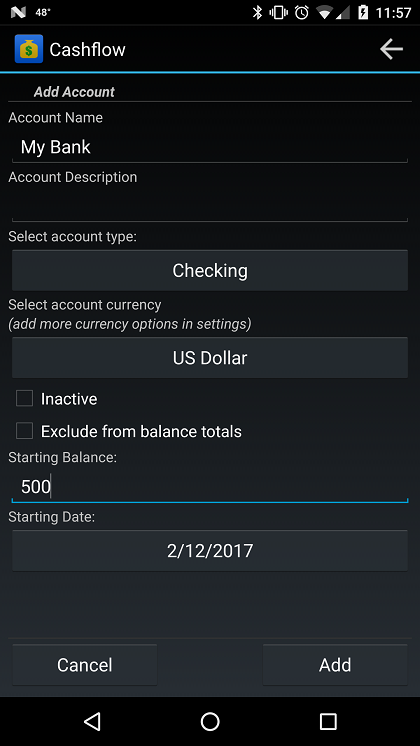 The “Add Account” screen will prompt you to enter some basic information to help identify the account. An Account Name and Account Type are required, while a description, and starting balance/date are optional. While required, the Account Type currently is only used for informational purposes. In the future, different account types will function differently within the application.
Your First Transaction
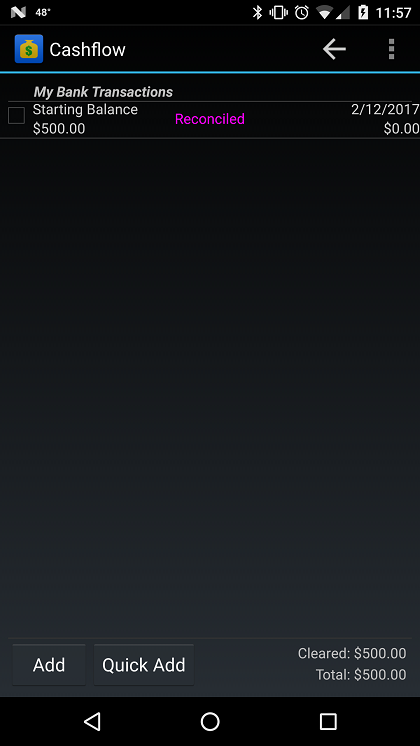
After adding your first account, you’ll be taken to the “Transactions” screen. The application will have added your first transaction already, an Adjustment for the starting balance for your account, on the date you specified on the “Add Account” screen. If you left the starting balance blank, you’ll see that the transaction has an amount of $0.00 on the current date. The “Quick Add” button can be used later to add a copy of a transaction that’s been previously recorded.
Adding Another Transaction
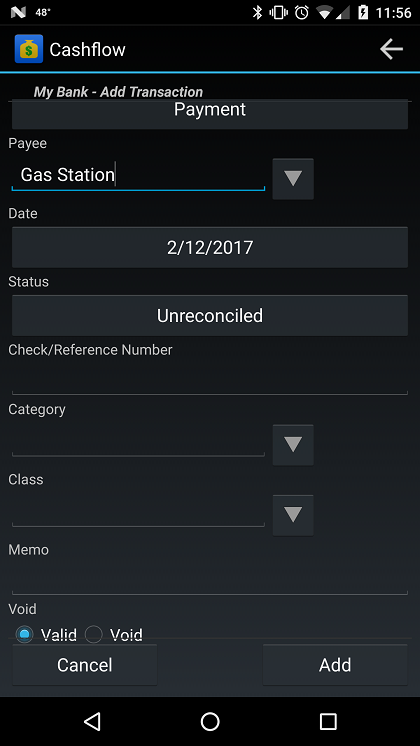
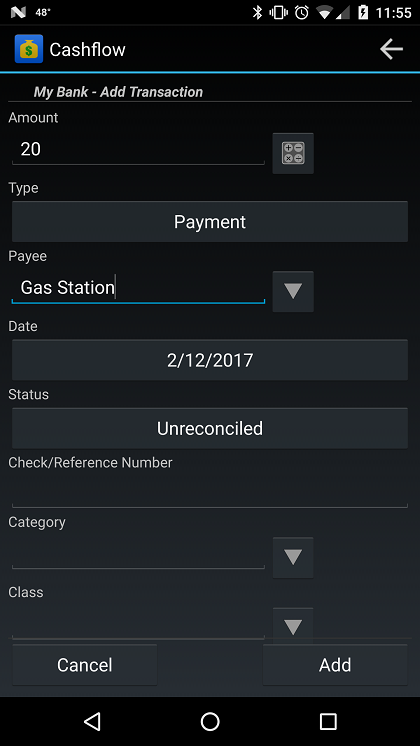 To add a transaction, simply click the “Add Transaction” button at the lower left corner of the “Transactions” screen. You’ll now be presented with the “Add Transaction” screen. The most used fields are at the top of the screen. In general, you’ll want to enter a transaction amount and payee at minimum. Click “Add” to add the transaction.
Back to the Transaction Screen
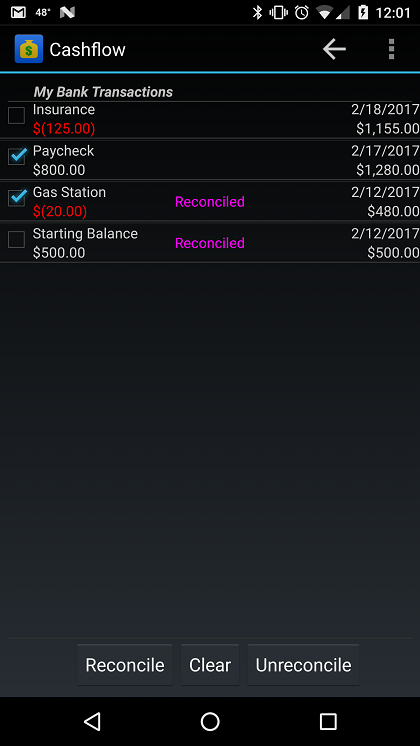
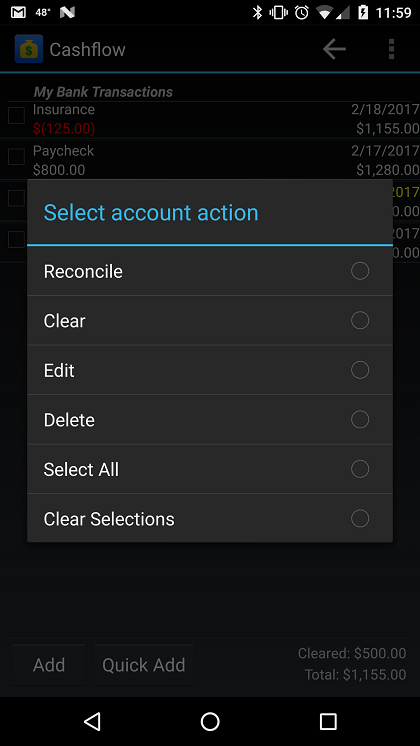 After adding a couple transactions, we’re now ready to explore the “Transactions” screen. Touching and holding your finger on a transaction prompts you with a menu to select the action you’d like to take; “Reconcile”, “Clear”, “Edit”, “Delete”, “Select All”, and “Clear Selections”. Alternatively, you can select multiple transactions by clicking the checkbox on the left side of the screen and using the three buttons at the bottom to “Reconcile”, “Clear”, or “Unreconcile” multiple transactions at once.
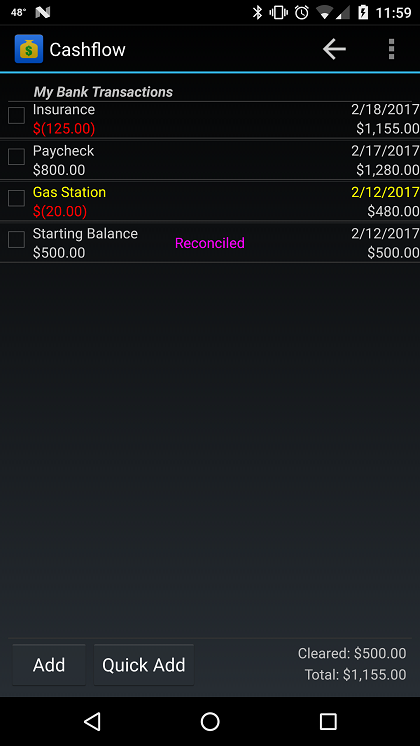 You can also simply touch a transaction briefly to bring up the “Edit Transaction” screen. If you don’t want to see Reconciled transactions on the screen, you can toggle the option to show or hide Reconciled transactions by pressing the menu and selecting the show/hide option. Pressing the back button on your device, from this screen, will return you to the “Accounts” screen.
Add/Edit Transaction
The “Add Transaction” and “Edit Transaction” screens allow users a number of options. The transaction date can be changed to be any date in the future or past. Your current balance and transaction running balances will be recalculated accordingly. Likewise, Cashflow offers a variety of transactions types. Adjustments and Deposits will be added to the account balance, while Transfers and Payments will be deducted from the account balance. Negative signs are allowed for all transactions types.
Transfer Between Accounts
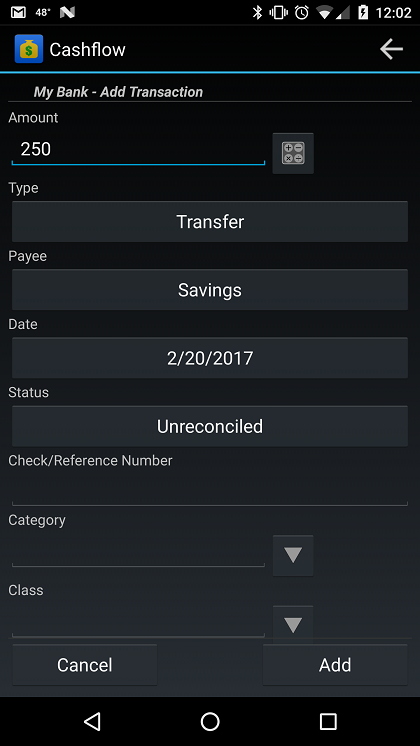
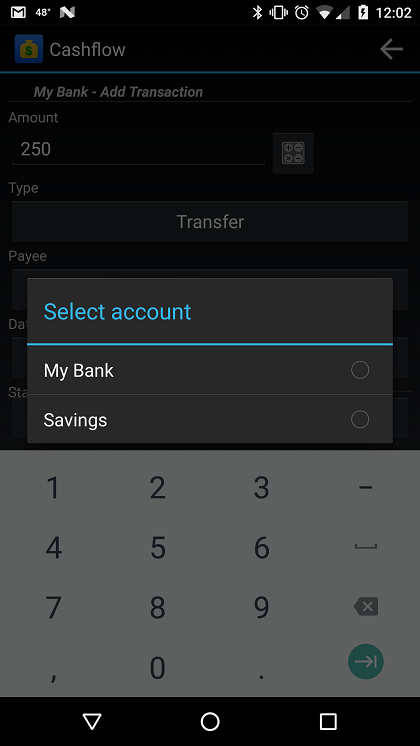 Transfers are a special kind of transaction type. If you change the type of a transaction to “Transfer”, the Payee field will disappear in favor of a button that will allow you to select an account to transfer money to/from. A “Transfer” transaction is actually two linked transactions. When you add or update a transaction as a transfer, it will create a corresponding transaction for the opposite amount in the account being transfered to/from. Changing either transaction from the “Edit Transaction” screen changes both transactions.